Thursday, April 18, 2013

Cupcakes, cupcakes, and more cupcakes


It  has been awhile since I have last posted about my cake creations but I have definitely been busy at work decorating and creating new flavors! So what has Dolly Cakes been up to? 

First off, my best friend and I have known each other since we were six years old. We have always been Disney fanatics, loving every single princess and wishing we could live in Disney World. Every year from age six to age nineteen she has had a princess themed birthday party. So for her twentieth birthday I made her princess cupcakes, all decked out with pink buttercream frosting, edible glitter, and princess decorations. They were quite befitting for the day!   


Last September, my cousin Jeff married his wife Jill. They are the first to get married in my family and we were so happy for them! About a month before the wedding, we had a picnic to celebrate the two of them and my cousin Teri and I decided to make a bunch of cupcakes for the family. It was so much fun to spend the time together, and we both love baking!

The first ones we baked, we made a vanilla cupcake and inserted a Lindt vanilla truffle inside just as they came out of the oven. We then topped each cupcake with vanilla buttercream, a pink rose, and edible cake glitter. The light cake with the rich center was a perfect match.


Next, we made a peanut butter cupcake. We added peanut butter to a vanilla cake batter which not only made it taste like peanut butter, but also gave it a denser texture which tasted great. We stuck a Reese's peanut butter cup in the center and dusted cocoa over the top to give it a little kick of chocolate!


We also baked a Hershey's chocolate cupcake, topped it with vanilla buttercream and added oreo cookie crumbs around the outside for a lighter, cookies'n'cream cupcake. To get the blue and purple tie-dye look, we striped the inside of the piping bag with a little of each color so it would blend into the frosting. The hearts are made out of melted white chocolate. It was a wedding after all, so love was in the air! (And the cupcakes!)


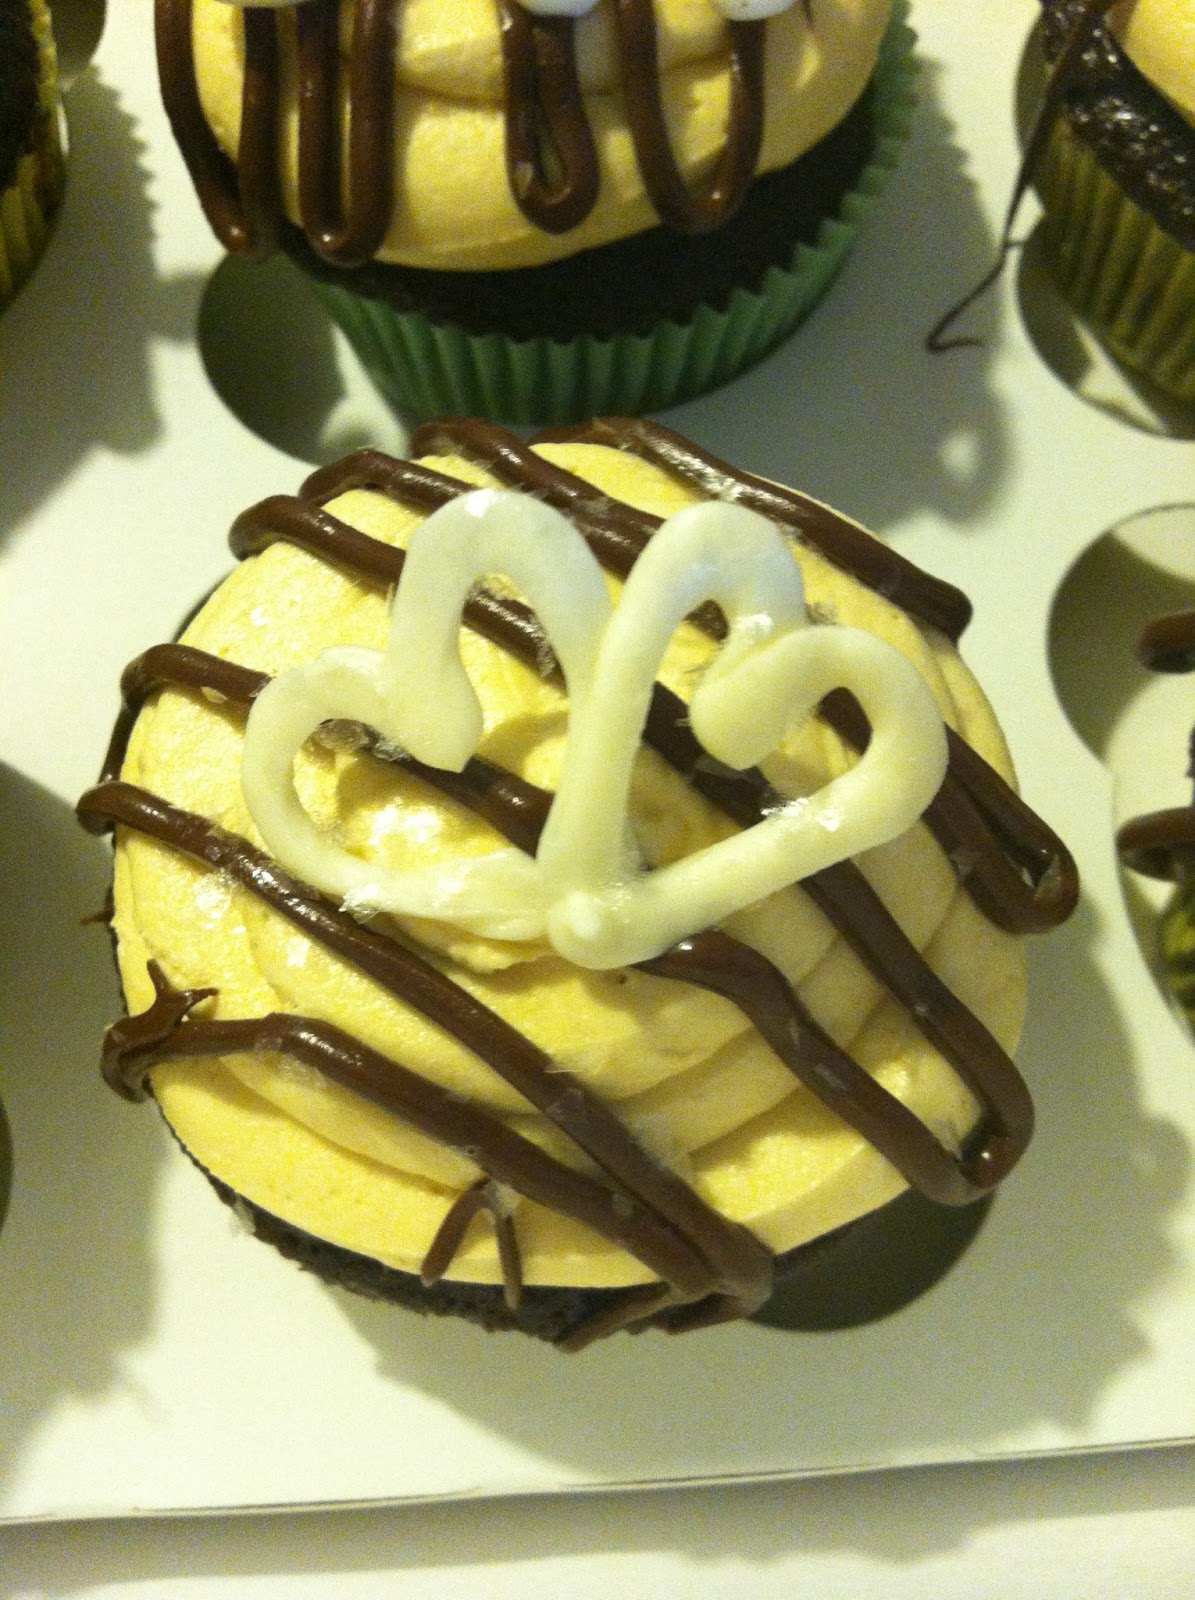
Lastly, we made my favorite cupcake, a Bailey's Irish Creme cupcake. We started with baking a Hershey's chocolate cupcake, and added Bailey's to the buttercream frosting. Because it is a cream liquor, it did not make the buttercream thin, but gave it a great creamy texture that perfectly matched the chocolate cake. With a little drizzle of chocolate and some white chocolate hearts, they were a hit, and definitely my favorite!!!


Here's the final presentation!


I attend Canisius College in Buffalo, NY, where I have met some of the greatest people, made the best friends, and had some of the most memorable adventures of my life thus far. One of these great people was a faculty member and an adviser of mine, Katie, who asked me to make cupcakes for her brother's newborn baby. They wanted to bring over cupcakes to the new parents to celebrate a new member of the family. Since it was summertime, I made a light vanilla cupcake, with a lemon buttercream frosting. It was a great flavor in the hot weather, and Katie said everyone loved them!


One of the other great schools I have had the opportunity to attend is Buffalo Academy of the Sacred Heart, also in Buffalo, NY, a private, all-girls Catholic high school just down the street from Canisius. Through Facebook, I have been able to keep in contact with some of the fantastic teachers I had there. One of them was Mr. McKinnon, my AP government and economics teacher, who is also the coach of the golf team. To celebrate the end of the season, he asked me to make three types of cupcakes. Since it was fall, I made an apple cinnamon cupcake. I added cinnamon to vanilla cake batter to give it that spicy flavor.Then, I combined buttercream frosting with apple jelly. This made the buttercream a little thicker and I also had to add almost the entire jar of jelly to give it a stronger apple flavor. Then i drizzled caramel over the top of the icing and sprinkled a little cinnamon. The caramel really brought together all of the flavors, definitely making it taste like fall! 


Next, I made a Hershey's chocolate cupcake and topped it with green vanilla buttercream. I used a grass tip to pipe the frosting on to make it look like a putting green, and then added the decorations on top. This cupcake was much simpler than the other flavors, but was great for the event!


The last cupcake combined two classic flavors, vanilla and raspberry. I made a vanilla cake, and added raspberry extract to buttercream frosting. I added a few chocolate chips at the end to give it a crunch and a little extra flavor.


So many cupcakes, so little time. But my favorite part about making cupcakes it all of the experimenting! If you have any flavor combinations you would like me to try out, I love trying new things! Anything you can imagine, I can create. Happy caking!

Friday, August 3, 2012

Disney Pixar's Cars 2 Cakes!

My most recent cake creation was Disney Pixar's Cars 2 themed! My friend's cousin turned three years old and, like me, loves the movie! I am a huge Disney fan so this project was by far one of my favorites, playing Disney music during the entire decorating process! I made an ice cream cake sporting a smiling Lightning McQueen, as well as sixteen mini car "cakelets," using a special pan made by Nordic Ware for the birthday party. Although it was one of the more challenging orders I have made, it was also one of the most fun!

For the ice cream cake, I lined a 9x13 inch cake pan with plastic wrap and then layered the ice cream and cookie crumbs one layer at a time, freezing each layer before starting another. After it was completely frozen solid, I iced the cake with Cool Whip, by far the best frosting for ice cream cake. Not only does it taste great with the ice cream, Cool Whip adheres to the ice cream very well. I then used fondant and gum paste to create Lightning McQueen, layering each colored shape and using water as "glue" to hold the shapes together.

For the "cakelets," I used a pound cake recipe that was provided with the pan. I have my own white cake recipe that I usually refer to, but because this pan was very intricate and had a lot of small spaces to fill, a cake with more density was needed. To ice the cakes, I used royal icing, made from confectioner sugar, meringue powder, vanilla, and water, to create the solid base. Royal icing is similar to sugar cookie icing, it is a poured frosting that smooths out and hardens onto the cake. This made it easy to pick up each car as I piped the details onto the cakelets. This was probably the most time consuming part of the project. Each car was so different and so detailed that it took about twenty minutes to decorate each car.


Overall this was such a fun project! Keep checking for more Dolly Cakes updates and make sure you "Like" my Facebook page, www.facebook.com/DollyCakesCakeArtistry, and follow me on Twitter, @DollyCakesBufNY. Thank you for reading and commenting!

Saturday, July 21, 2012

Safari Adventure

And yes these cupcakes were an adventure..... This weekend, my dad's coworker's daughter was having a safari themed birthday and asked for cupcakes to match. The family actually loaned me an awesome cupcake decorating book where they got the safari idea from that listed directions and the best materials to work with to create the animal effect. I may go buy that book!


The elephants were by far the most difficult to make. The book gave a template for the white chocolate ears and nose but after I stuck them into the sides of the cupcakes they immediately started to sink a little with the weight. Oh, NO! This is a decorator's worst nightmare, when gravity and temperature are against you. Although it was a cooler day in Buffalo then the upwards of 90 degrees we've been experiencing, chocolate is so delicate that even the slightest bit of humidity can be detrimental to your project. So I decorated them, added a little extra buttercream as "glue" and immediately stuck them in the fridge with the hope that once the frosting hardened a little it would keep the ears and nose solidly in the cupcake. As of now, while waiting for the customer to pick them up, they're still together! I really hope the customer has a smooth drive home.....


The monkeys, oppositely, were the easiest of the three animals! That was as simple as frosting the cupcakes and adding other colors and candies to make the face! The most clever part? Cheerios for the ears! The best part about this book was that it gave edible suggestions other than frosting to make the facial features, very creative ideas that I would have never thought of.


I made the lions last which were also not too complicated. The faces were simple enough, similar to the monkeys, but the licorice mane was definitely time consuming. From cutting up the candy to sticking them into the cupcakes one by one, it was pretty labor intensive. I especially loved the colors on this cupcake, perfect for kids!


Hopefully the kids have a great party today and best wishes to the birthday girl!

Sunday, July 15, 2012

Cosmetic Cake Creation


A good friend of mine asked me to help her make a birthday cake for her sister, a makeup artist. She picked out the eye shadow you see above and together we worked to create this cake! It took a long time and a little experimenting to get the colors and the cake to look like the makeup but I think we did a pretty good job, don't you?

We started by covering the cake in black fondant. For those who don't know, fondant is what gives the cake the silky smooth exterior, very often seen on wedding cakes. It's a combination of sugar, glycerin, and a lot of other ingredients that you roll out and lay over a thinly frosted cake. We then took a small piece of white fondant and added a small amount of green, yellow, and blue food coloring and gently folded them into the white to give it the marbled look. To create the letters, we added tylose powder to the black fondant to create gum paste. Gum paste has a clay-like texture which is easier to work with when making shapes or 3D figures. After adding a small buttercream border to the very bottom of the cake, it was complete!

This was a lot of fun to make and I hope my friend's sister had a very happy birthday!

Friday, July 13, 2012

Ladies and gentlemen, let me introduce myself....

Everyone has childhood dreams, things they want to do and professions they want to persue when they "grow up." But discovering my dream came as an accident. I never though about becoming an entrepreneuer or wanting to decorate cakes for the rest of my life, but that's exactly what I'm doing. After college decisions, multiple major changes, and trying to decide on a course of study that would best fit my non-existent professional endeavors at the time, halfway through a business major and a job at a local supermarket later I have decided to simply go for it. My name is Mary Maroney, I'm a 20-year-old college student from the suburbs, and I own Dolly Cakes, the finest cake artistry in Buffalo, NY.

Where did the name come from you ask? When deciding on a name for the company I wanted something catchy and fun, but also personal and close to my heart. I played with the idea of Buffalo as the Queen City, trying to incorporate the city I love, and painstakingly bounced names back and forth with friends and family, attempting to find something that was simply "me." And then one day, while sitting in my dorm room at Canisius College (another place I call home), talking with one of my very good friends, it hit me. Dolly Cakes. As one of the many nicknames my mom had for me as a child and still does, it was personal, had that cutsy appeal, and more than anything, it was "me." And so I had completed step one.

So now what? I had the name, logo was next. I have a very talented friend, Tan Ho, who has produced some of the best digital media art I've seen. And the awesome logo you see as my default picture was created by him, along with the flyer and business cards I will soon be ordering. He took a simple drawing I sketched and turned it into more than I could have ever dreamed of. Once again, it was very "me." Step two, check.

But how do I get the word out there? How will people know I exist? For now it's been mostly through word or mouth, but through one of my favorite developments of the modern world, the World Wide Web, I have created a Facebook page, http://www.facebook.com/DollyCakesCakeArtistry, a Twitter profile, http://twitter.com/DollyCakesBufNY, and this blog. Not only is the Internet and Social Media sites one of the fastest ways to reach people, it's simple and most important, free. As the classic struggling college student, free is one of my favorite words. Step three, complete.

The best part? I would have to say is what I make. I have very dedicated taste testers that oh so graciously volunteer their time and taste buds to criticizing my creations. From friends, to family, to my dad's coworkers, I have many people whom I appreciate to tell me what I'm doing great and what I can improve on. I've made cupcakes ranging from Strawberry Daiquiri and Bailey's Irish Cream flavors, to Coconut Lime, Creamsicle, and Chocolate Peanut Butter. Any flavor you can think of, I can create a cake, filling, and frosting to match. I also create event cakes, not only with frosting, but with fondant and gum paste, you know, the fancy stuff we dreamily obsess over on the Food Network and TLC. If you can dream it up, I can create it. I am completely self taught with a little bit of advice and help from friends who have had professional training. I will be posting pictures of each cake and cupcake creation I make and ask for all the feedback I can get! (Constructive criticism only please. )

So there you have it. I'm just a girl who finally figured out what she wanted to do with her life and I'm jumping in head first. As I said before, my name is Mary Maroney, I'm a  20-year-old college student from the suburbs, and I own Dolly Cakes, the finest cake artistry in Buffalo, NY.


Since I have no official store location, I am taking all orders via phone (716-348-8684) and email (dollycakescakeartistry@gmail.com). Spread the word!